
Windows 8 is designed to run smoother and perform better even in the critical situations. However, as like other operating system problems, it may also run into problems and might prevent you to access your computer normally.
Luckily, Windows 8 is furnished with many advanced tools and automatic repair options to heal common issues which causes defective performance, booting failure, freezing etc. Manually looking for problems with your Windows 8 computer is time consuming and comprises lot of computer knowledge.
To make the troubleshooting process simpler, Windows 8 has introduced these tools to automatically find and repair problems and let you use your computer as before. Coming straight to the point, let’s discuss about those tools and how you can use it if facing similar situations:
#1 Use Automatic Repair option
Windows will automatically launch self recovery tool like 'Automatic Repair' to address issues with your Windows 8 computer. It can repair unbootable computer, freezes, inaccessibility and thus, allows user to recover deleted hard disk partitions and data.
What it scans:
- Configuration options
- Various settings
- Corrupt system files that causes damages
What it Repairs:
- Damaged system files and registries
- Removes malware and boot sector virus
- Unwanted settings
- Makes file system stable to boot
- To access automatic repair, simply press ‘Windows + Q’ button and type ‘Advanced’ in the search text bar. Tap on ‘Settings’ and then click on ‘Advanced Startup Options’ from the search results appear at the left side of the window.

- On the ‘General PC Settings’ screen, scroll down your window to bottom and locate advanced startup. Click on the restart now button placed just below the advanced startup option. Windows 8 will begin restarting and take you to the advanced startup options menu.

- Click on Troubleshoot from choose an option screen and then advanced options button. Next screen will open with an option to begin Automatic repair. Once you click on it, Windows 8 will prepare automatic repair environment. In between, you’ll need to enter Administrator password for your account that you’re trying to repair.

Note: While performing automatic repair, your computer will restarts. So be calm and stay relax as it may take time, sometimes longer than expected.
Once automatic repair completed its intended tasks, you can see what it has already repaired and what it can’t. In case automatic repair can’t able to repair any problems, it’ll show you an option to shut down your computer or use even more advanced tools.

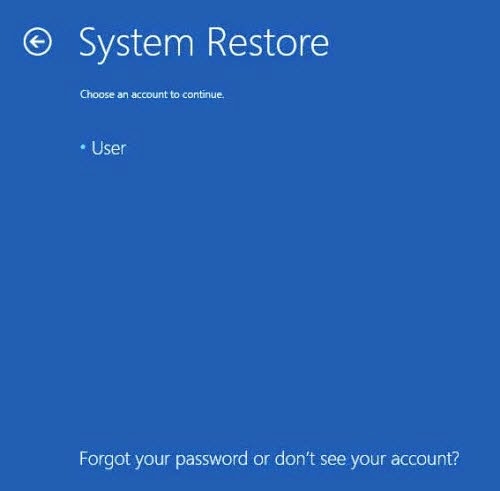
#2 Use System Restore
This is the second place you should look if automatic repair can’t find any problems. System restore works well if your PC run into unknown problems and can’t be repaired manually or by using third party tools. It’ll simply restore everything back to any previous date (known as restore point) when you know that the system was performing well. You can easily access this option from Windows 8 recovery environment.
Follow step 1 and step 2 as you did while accessing Automatic repair option to get to the ‘Choose an option’ screen. Now click on ‘Troubleshoot’ button and then ‘Advanced option’. Next screen will include ‘System Restore’ option, click on it to let windows prepare for restoring the system. You’ll reach to screen where you may require to enter administrator password. After entering the password, click on ‘Continue’ button and the system will begin ‘Restore’.
Click on the ‘Next’ button and wizard will comes with list of restore points currently available. Choose any date which you think that the system was working well. Be careful to check for ‘Scan for affected programs’ which becomes visible only after choosing any date to restore your system. It’ll simply list all the programs or updates which will be removed when you choose to restore your system at that particular instant of time.

If you’re satisfied with it and wants to continue, click on ‘Next’ to begin restoring your system to that particular date. Click on ‘Yes’ when the confirmation box appears to ask you about confirmation of this task.

After restoring process finished, it’ll display a confirmation box stating that the restoring process has been completed successfully.
Click on the ‘Restart’ button to restart your system and see if you may able to use your Windows 8 computer as before.
#3 Refresh or Reset your Windows 8 computer
Refresh or Reset option is introduced with Windows 8 computer to address almost any technical glitches and brings back PC to perfectly working state. These are the different Windows 8 healing method from the aforementioned and may involves pros hands to care of everything and make sure that you’re not running into any additional difficulties.
Refreshing Windows 8 computer will simply revive system from freezing, booting failure and similar difficulties without removing your apps (only apps that came with Windows 8 when shipped) and files. However, you’ll need to reinstall all your desktop apps customize your PC settings. So be careful while performing this step unlike the other two mentioned previously.
In simple terms, refresh will simply removes nearly all the minor or major problems with your operating system without making it as fresh it was before. From the ‘General PC settings page’, you can find the option to ‘Refresh your PC without affecting your system files.’ Click on the ‘Get Started’ icon located just below this option and windows 8 will begin refreshing your computer.

Next screen will simply contains each and everything you need to know about what happens if you choose to refresh your PC. Once assured, click on ‘Next’ and Windows 8 will perform refresh.

You’ll also need to insert Windows 8 installation or recovery media to complete this task as it’s not a standalone process. At that stage, if you don’t have any such media, consider borrowing it from your friends or make one by using different Windows 8 computer. Just few more steps after inserting the desired media and you’ll ready again to sign in with your Microsoft account and begin exploring your computer as before.
Note: List of removed apps will pop up as soon as the system restarts. Here you’ll get a detailed idea about which apps you may need to reinstall and later, perform one by one installation.
Unlike refresh, resetting your PC will simply remove everything from the system and make it as fresh as when shipped. You can adopt this idea too when thinking about disposing or selling out your Windows 8 computer as it’ll make you free from any trouble of your data from being stolen or misused.
Again, from the ‘General PC settings’ screen you can find option to ‘Remove everything and reinstall Windows’. Click on ‘Get started’ button and then ‘Next’ on the blue ribbon pop up message stating further details about this process. On the next screen, you’ll get two option just remove my files (quick method) and fully clean the drive (usually takes longer time than the first one). Choose any one based on your requirement and within moments, Window will restart and asks you to follow steps exactly as you did on the first time.

Surely, this isn’t a good idea when you wants your apps and data to be intact. However, if no other ways has been left or none of them working in fixing problems with your Windows 8 computer, adopt any of these two options and it’ll do the trick for sure.
Have you faced similar Windows 8 booting failure issues in the past and was able to recover from it using different method or tools, we would love to hear!!