
Disk Utility is able to accomplish tasks such as formatting
a partition, creating new partition, deleting existing partition and resizing a
partition to take the useful hard drive spaces. Most of the time, Disk utility
would let you do the above-mentioned task without much of an effort. You may
not need to have some utility other than Disk Utility to get tasks done with
partitioning.
But at times, situation differs and takes form of much complicity
and that too an extent where Disk Utility fails to get the job done.
Take an example:
You created a new partition out a HDD, say of 50-100 GB. Later, you decide to
delete this partition and now want the free space taken by corresponding
volume. So, you easily drag the upper partition to the spaces left by the
deleted partition. You click ‘Apply<<Partition’
& Disk Utility completes the task.
However, to your surprise, you notice no such resizing is
done even after DU completes the execution.
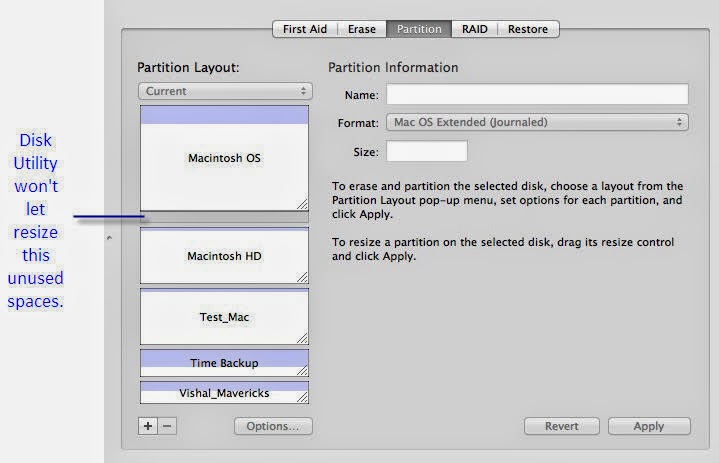
It is now understood that something is seriously wrong with
the spaces left between the partitions & Disk utility won’t let you resize
that space.
What could be the possible reasons?
- The spaces left after deletion of the newly created partition is unrecognised by the OS X.
- The spaces may have been assigned a file format, which is beyond recognisable, by Disk Utility.
- There might be some logical corruption with the spaces left after deletion of the partition.
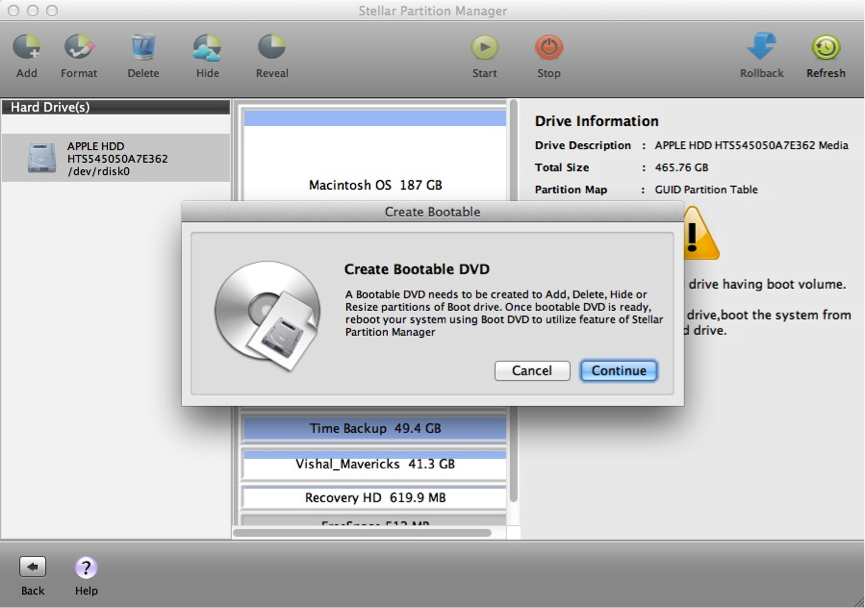
Since, Disk utility have failed, turning head towards 3rd
party Partition Manager software seems logical. To get resizing done one can get
help from Stellar Partition Manager software. Download & installed this
tool on Mac OS X. This tool will first create a bootable DVD for Mac so that
the OS partition is made to cover-up the left spaces.
How to resize with
Stellar Partition Manager?
Create the boot DVD: Since my Mac didn’t have an optical disk reader slot, I used an additional h/w to burn the OS partition on DVD.
Please Note: As
in my case, I have 1 HDD installed on my Mac, so it doesn’t matter how many
extended partitions I got, Stellar Partition Manager will ask me to create a
boot DVD in order to accomplish my task. Had there been couple of hard disk
drives, I would have easily worked on the other drive (which is not a start-up
disk) & managed partitions.
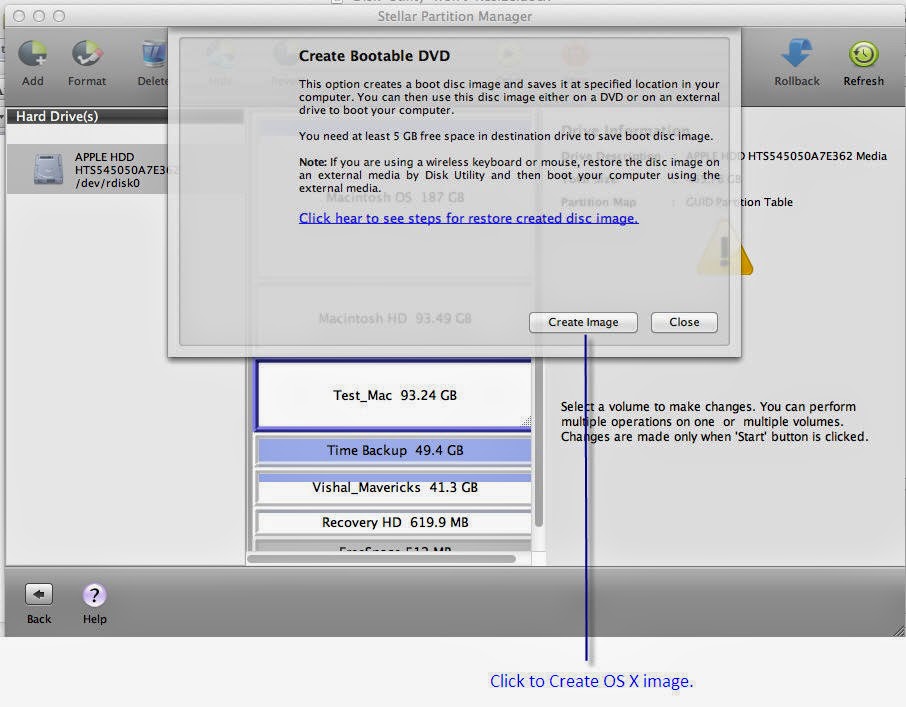
Save Image to a destination: Click on the ‘Create Image’ button
& define a destination to save .dmg file of OS X startup disk.
Alternatively, if the Mac machine has a mounted DVD burner then it will begin
burning the disk.
- Now burn the image with Disk Utility
- Once the burn finishes, restart the Mac OS X.
- Hold down the ‘Option’ key once the Mac begins to start.
- Select the DVD disk to boot from the Mac.
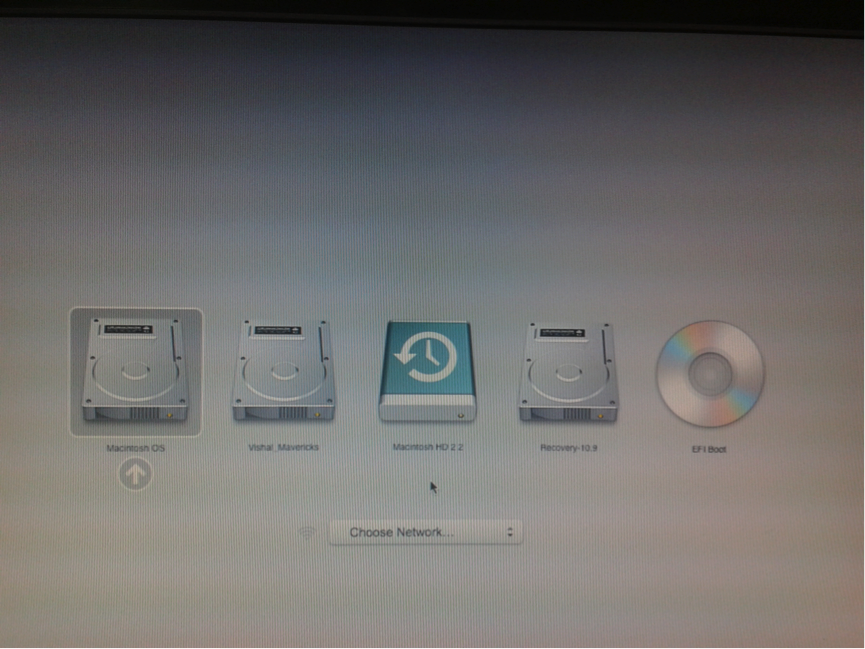
Bootable Environment:
The Mac goes into bootable environment with the DVD, which was burnt. StellarPartition Manager has imaged itself along with the useful OS X file to boot the
Mac.
 |
| The image is captured in bootable environment with mobile camera
Stellar Partition Manager software launches in bootable environment. Click ‘I Agree’ to continue. With the tool, resize the OS X disk to take the unused spaces. Click Play button to begin the process. A warning message will appear. ‘Proceed ‘Continue’.
Stellar Partition Manager will
execute the requested task to resize OS X startup disk & acquire the spaces
that were left by deletion of a partition.

Resizing Done:

Final Outcome:

With the above screenshot, the
unused spaces have been successfully resized with the help of Stellar Partition Manager software. The same was unachievable via Disk Utility.
|